
-
Empty cart
No products in the cart.
Return to Shop

Related Products

DTF Printer 24 Inch with Dual I3200 XP600 Print Head
$13,999.00DTF Printer 24 Inch with Dual I3200 XP600 Print Head Heat Direct Transfer Film 60CM DTF Printer with Powder Shaker for T shirt


DTF Gang Sheets
$16.99 – $64.99DTF Full Color Transfers
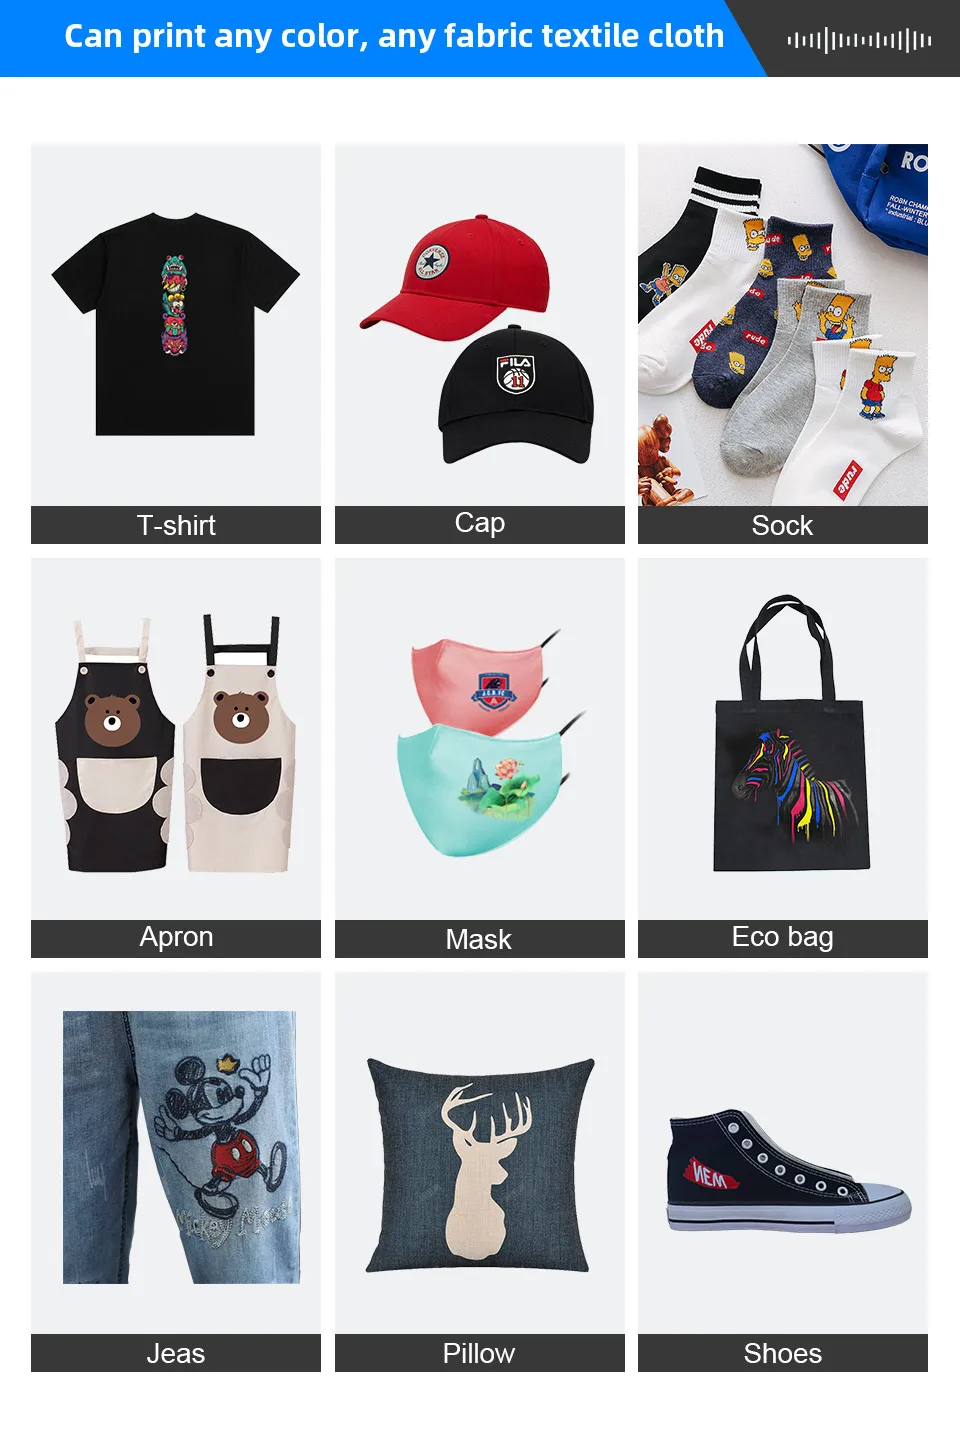
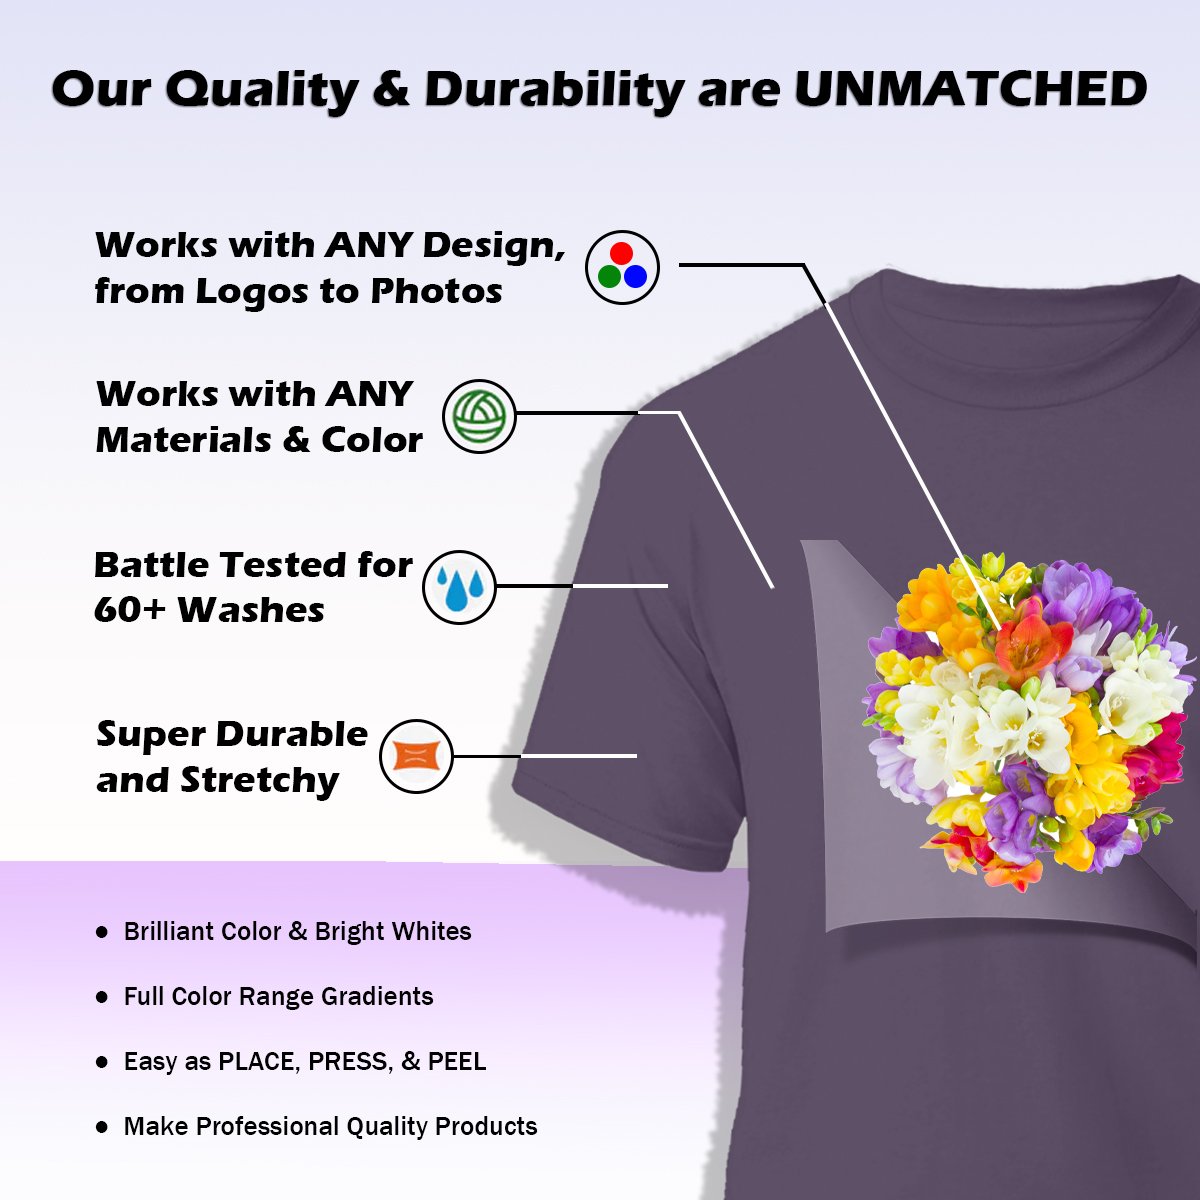
WALAKustom DTF Direct to Film Full Color Transfers are soft full color transfers that can be pressed on most fabrics! There are no quantity minimums on these transfers-so you can order single orders to super large orders. WALAKustom Full Color Transfers are suitable for cotton, poly, cotton, polyester, and most fabrics with recommended test press.
- Transfer sheets
- 22″ x 24″
- 22″ x 36″
- 22″ x 48″
- 22″ x 72″
- 22″ x 96″
- Ganging allowed!
- Your design cannot be bigger than the sheet size you selected.
- Artwork will be sized to the max sheet size unless otherwise specified
- Any details smaller than 1 point (0.35mm) will have a colored outline/backing (matching the intended garment color) added by production.
- Your design cannot be bigger than the sheet size you selected.
- Artwork will be sized to the max sheet size unless otherwise specified.
- Copyright material is NOT permitted (without written documentation).
- Not suitable for iron or handheld press.
- No quantity minimums
- 1-2 business days turnaround time before shipment
- Full Color
- Crisp defined edges
- Great for small orders
- PEEL WARM
- No Cutting or Weeding
- Suitable for all fabric types

Custom Full Color DTF Transfers
$0.99 – $35.29DTF Full Color Transfers
Our DTF Direct to Film Full Color Transfers are soft full color transfers that can be pressed on most fabrics! There are no quantity minimums on these transfers, so you can order from single transfers to large quantities. Order your DTF transfers as individual transfer sheets ready to press, or as DTF gang sheets with multiple designs per sheet.
These DTF Transfers are suitable for cotton, poly, cotton, polyester, and most fabrics, but always recommend a test press.
- DTF Transfer sheet sizes
- 2″x2″
- 2.5″x2.5″
- 2″x4″
- 3″x3″
- 3″x5″
- 4″x4″
- 5″x5″
- 6″x6″
- 7″x7″
- 8″x8″
- 8.5″x11″
- 9″x9″
- 9″x11″ (A4)
- 10″x10″
- 11″x5″
- 11″x11″
- 11″x17″
- 12″x12″
- 12″x17″
- 13″x19″
- 15″x24″
- 15″x36″
- 15″x48″
- DTF Sheet Ganging is allowed
- Any details smaller than 1 point (0.35mm) will have a colored outline/backing (matching the intended garment color) added by production.
- Your design cannot be bigger than the sheet size you selected.
- Artwork will be sized to the max sheet size unless otherwise specified.
- Copyright material is NOT permitted (without written documentation).
- Not suitable for iron or handheld press.
- No quantity minimums
- 1-2 business days turnaround time before shipment
- Full Color
- Crisp defined edges
- Great for small orders
- PEEL WARM
- No Cutting or Weeding
- Suitable for all fabric types


DTF Film Rolls (Cold/Warm Peel)
$59.99 – $84.99- High Ink Loading Layer: You can lay down more color / white to create rich colored decorated DTF prints.
- Hot Peel: Peel off the film without a long wait after the first press.
- Single Side Matte: Easily distinguish the print side.
- Compatible with: Any DTF printer on the market (Recommended use with a roll printer)